Posts com a tag: android
The curious case of NFC and LineageOS battery consumption
2021-05-31 21:30 +0100. Tags: comp, android, in-english
I was experiencing short battery duration (the battery was lasting barely 1 day) on my Samsung Galaxy J3 (2016) phone running LineageOS 14.1. The battery didn’t last any longer with the original ROM, so I assumed that the battery was old and bought a new one, replacing the original 2600mAh battery with an third-party 3630mAh one. The battery duration did improve a bit, but not nearly as much as I expected it to with a new battery with larger capacity. So I decided to investigate the situation a bit better.
The webs had told that the problem was likely some application holding a wakelock, blocking the phone from sleeping. I installed an app called BetterBatteryStats, which can be found on F-Droid. This app runs in background and collects battery usage statistics from running apps; you have to let it run for a while to get useful information from it. After some 30 minutes, I looked at the Partial Wakelocks panel and saw that there was a NfcService:mRoutingWakeLock item responsible for some 22% of battery consumption.
Now, NFC is a technology used for contactless payments using the phone, and similar applications. The Galaxy J3 does not support NFC. I’m not sure why the system was wasting CPU on this; I have found other people complaining about this same issue on the same ROM and phone.
The solution is to disable NFC Service in the system. Open up adb shell, become root (su), and then run:
pm hide com.android.nfc
After you do this, the system will loop complaining that NFC Service has been stopped. Restart the phone, and the error will be gone.
After a full charge, the system battery stats now tell me the battery will last 4 days. Will it really? Only time will tell, but I can already see that the battery is draining much more slowly than before.
A bunch of things I learned while fighting androids
2019-11-10 23:06 -0300. Tags: comp, android, in-english
I recently had to bypass Android's Factory Reset Protection again, this time for a Samsung Galaxy J4. The procedure at the end turned out to be relatively simple (find a way to get to a browser from the initial screen, download a pair of APKs, finish the Google account login with a random Google account, uninstall the APKs). However, due to the circumstances I was operating in, I spent a lot of time figuring out how to share an internet connection from my laptop with a second Android phone so I could share it with the J4 using the second phone as a wi-fi hostspot. This post documents what I learned.
Bypassing FRP on the Samsung Galaxy J4
There are dozens of videos on YouTube explaining how to do it. I will summarize the information here.
Part 1: Getting to a browser
- At the initial screen, select the language and connect to a wi-fi network.
- When you get to the screen asking for the Google account, hit the Home button (the large middle one below the screen) 5 times. This will enable the TalkBack accessibility thing.
- Draw an L gesture on the screen; this will bring up TalkBack global context menu.
- Select "TalkBack settings". (To select things while TalkBack is enabled, first tap the thing once to select it, then tap the screen twice to activate it. You can disable TalkBack by hitting Home 5 times again after you get to the settings menu.)
- Select "Help and feedback".
- Select "About Switch Access for Android". This will lead to a help screen containing a YouTube video. Tap the video "Share" icon, then the "…" icon. This will lead to the YouTube app.
- Swipe down (scroll up) to make the YouTube top bar visible, and click the user/login icon at the top right.
- On the login screen, click "Privacy terms". This will open up Chrome. It will ask you to accept the terms and conditions (click 'Accept'), then ask you about Data Saver (it doesn't matter what you choose here, just click 'Next'), and ask you to log in on Chrome (don't log in, click 'No, thanks').
- Congrats, you have landed on a browser.
Part 2: Installing a bunch of APKs
- Go to
https://frpfile.com/bypass/. DISCLAIMER: I don't know if those APKs can be trusted. - Download and install "Google-Account-Manager-Android-8.apk".
- Download and install "BypassFRP-1.0.apk" and click "Open" at the end of the installation.
- You will land on a screen asking for a password. Ignore that; click "⋮" and select "Login in browser".
- Now log in with a Google account of your own choosing. I would recommend using an account other than your main account, since we don't really know if the APKs we just installed are trustworthy or are capable of stealing your credentials. 🤷
- Finish the phone setup normally.
- After the phone has finished starting, go to "Settings > Apps" and uninstall the APKs you just installed. (I'm innocently assuming here that uninstalling them is enough to stop them from doing any harm. 🤷)
That's it.
Internet sharing shenanigans
Sharing your Android phone's internet connection with your computer is pretty easy: you just enable USB tethering on the phone, and everything magically works (at worst, you have to call dhclient YOUR-USB-INTERFACE on Linux if you don't have NetworkManager running). Doing the opposite, i.e., sharing your (Linux) computer connection with the phone, has to be done manually. Here is how it goes (I'm assuming a rooted phone; mine runs LineageOS 14.1 (Android 7)):
- Put the phone USB connection into RNDIS mode: Settings > Developer Options > Select USB Configuration > RNDIS (USB Ethernet).
- On a terminal, as root (either via the Terminal app or via
adb shellfrom the computer), set up the interface with some IP of choice, e.g.,ip addr add 10.0.5.2/24 dev rndis0 ip link set rndis0 up
- Do the same on the computer, with a different IP address in the same subnetwork:
sudo ip addr add 10.0.5.1/24 dev rndis0
sudo ip link set rndis0 up
Note: Most likely you will have to replace
rndis0with something else, depending on the name your system decided to give to the USB interface. - By now, you should be able to ping one machine from the other (i.e.,
ping 10.0.5.2from the computer should work). - Caution: if NetworkManager is enabled, it may mess your settings for the new interface. You have to either convince NetworkManager to ignore the interface, or stop NetworkManager (which is what I did:
sudo service network-manager stop).
Now, to share the internet connection:
- On the PC, set up an
iptablesrule to do NAT forwarding:sudo iptables -t nat -A POSTROUTING -o <your-internet-interface> -j MASQUERADE
- Enable forwarding:
echo 1 | sudo tee /proc/sys/net/ipv4/ip_forward - On the phone, set the default gateway to point to the PC:
ip route add default via 10.0.5.1
- You should now be able to ping internet addresses from the phone, e.g.,
ping 8.8.8.8should work). - Now a weird thing happens: after you do that, only root sees the internet. You have to run the following incantation to give everyone access (source):
ip rule add from all lookup main
We still have to set DNS. Android does not seem to have a resolv.conf file; I found multiple ways you can set DNS (using 1.0.0.1 and 1.1.1.1 as the DNS servers in the examples):
setprop net.dns1 1.0.0.1; setprop net.dns2 1.1.1.1setprop net.rndis0.dns1 1.0.0.1; setprop net.rndis0.dns1 1.1.1.1ndc resolver setnetdns rndis0 1.0.0.1 1.1.1.1
The last one is the only one that worked for me – and it requires two DNS servers as arguments.
By now, you should have a working internet connection on your phone (you can try it in the browser, for example).
If you want to share it with other devices via wi-fi, you can now enable Wi-Fi Hotspot on the phone. However, there is another weird thing here: for some reason, my phone would reject all DNS queries coming from the other devices. The 'solution' I ended up using was to redirect all requests to port 53 (DNS) coming from other devices to the DNS server I wanted to use:
iptables -t nat -A PREROUTING -p tcp --dport 53 -j DNAT --to-destination 1.0.0.1:53
iptables -t nat -A PREROUTING -p udp --dport 53 -j DNAT --to-destination 1.0.0.1:53
This will skip the Android builtin DNS server entirely, and send DNS requests directly to the desired DNS server.
Bypassing Android's Factory Reset Protection on an Asus ZenFone Go
2018-05-15 00:03 -0300. Tags: comp, android, in-english
Modern Android versions come with a security (?) mechanism which requires the user to log in with a Google account previously used on the phone after a factory reset.
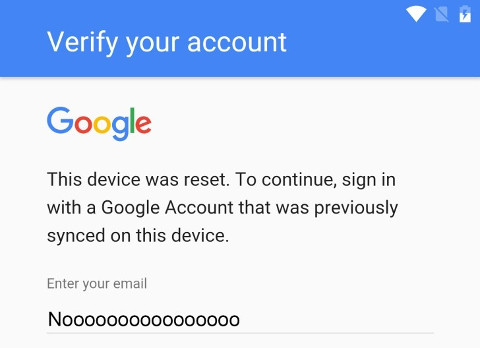
Picture source: Softpedia
There are dozens of different instructions for how to bypass this protection on the web, but none of the ones I tried to follow worked on the phone in question, an Asus ZenFone Go (ZB452KG). There are probably multiple firmware versions around for this phone model alone, so what works on one phone may not work on another. However, the various tutorials I found helped me discover a method that did work on my phone.
Ingredients: You will need a non-Google e-mail account to add to the phone, as well as the IMAP and STMP settings for your e-mail provider. You can remove this account after we're finished.
The goal: The goal of this exercise is to disable the Google apps in the phone settings: if they are disabled, the setup wizard will skip the account validation step. The trick is how to get to the phone settings before unlocking it.
Steps:
Follow the setup wizard until you get to the account validation screen. I recommend that, at the beginning of the wizard, you choose English as language, so that the Google app names all begin with "Google" and so are listed all together and are easier to find.
Select the e-mail field to open up the keyboard, tap the "⋮" button, select "Share", and "GMail".
Click "Skip" at the initial GMail screen. GMail will ask you to add an account. Configure your non-Google account here.
When you get to the compose message screen, tap the "⋮" button on the top right, choose "Settings", hit "⋮" again, and "Manage accounts". It will say "You're about to go to the Settings app …"; hit "Continue". Now we're at the phone settings!
Select "Apps", go to the "All" tab, and select the "Google Account Manager" app. Select "Force stop", and then "Disable". (You'll be asked to confirm these actions.)
Note: I actually disabled a bunch of other apps with names beginning with "Google" (such as "Google Services Framework") when I did this; I think this is not strictly necessary, but you can try it if disabling just "Google Account Manager" does not work.
Go back to the beginning of the setup wizard and follow the normal setup steps. Now at the point it would ask you for a Google account, it should ask for your name and surname instead. If this happens, it worked! Just finish the wizard and you'll have your phone unlocked.
If it does not work, try to go to "Settings > Apps > All" again and force stop the "Setup Wizard" applications (there are two of them on my phone), and then try to restart the wizard (you may have to turn your phone off and on again for that).
If you wish, go back to Settings and re-enable the apps you disabled. You can now also remove your IMAP e-mail account if desired.
CyanogenMod 7 no Samsung Galaxy 5, e dicas para desbrickar o aparelho
2013-01-17 02:51 -0200. Tags: comp, android, em-portugues
No último fim-de-semana eu resolvi experimentar o tal do CyanogenMod. Para quem não sabe, o CyanogenMod é uma variante do Android com algumas funcionalidades extra, mantida não-comercialmente por uma comunidade de desenvolvedores.
O Samsung Galaxy 5 (a.k.a. Europa, a.k.a. GT-I5500x) não é oficialmente suportado pelo CyanogenMod. Ports não-oficiais do CyanogenMod 7 e 9 são mantidos pelos desenvolvedores do MAD Team. O port do CyanogenMod 9 (baseado no Android 4.0) ainda está em alpha, e não é recomendado para uso diário. Por outro lado, estou usando o CyanogenMod 7 (baseado no Android 2.3.7) há quatro dias e não tive problema nenhum com ele (de fato tenho tido menos problemas com ele do que com a ROM que veio com o aparelho).
Instalando o CyanogenMod 7
As instruções no site do MAD Team apresentam duas maneiras de instalar o CyanogenMod: através do MAD Manager, um aplicativo para o Android que permite baixar e instalar as ROMs diretamente a partir do celular, sem necessidade de um PC por perto, e que parece ser totalmente excelente e fácil de usar; e através do Odin, um programa Windows-only e proprietário para flashear ROMs em aparelhos Samsung.
Por algum misterioso motivo do qual eu não me recordo (possivelmente porque não achei o MAD Manager para baixar fora da lojinha do Google, da qual eu não tenho como baixá-lo por não ter conta no Google), eu fiz a instalação de uma terceira maneira. A menos que você tenha um bom motivo, eu recomendo usar o MAD Manager, que é a maneira "oficial" recomendada pelo MAD Team para flashear a ROM. (Por outro lado, eu recomendo manter uma distância saudável do Odin, que não é lá uma criatura muito confiável.) Relato aqui o método que eu usei para caso você tenha problemas usando o método oficial.
Ative o USB Debugging, e faça backup de seus dados
Antes de mais nada, vá em Settings > Applications > Development e marque Android debugging. Isso permitirá que você use o programa adb para tentar salvar o dispositivo caso ocorra algum problema. Não é para ocorrer nenhum problema, mas nunca se sabe.
Feito isso, faça backup dos dados do celular (contatos e outras coisas que não deseje perder); os dados serão apagados no processo de instalação.
Instale o ClockworkMod Recovery
Os aparelhos Android-based possuem um "recovery mode", a partir do qual é possível instalar atualizações de firmware, limpar as configurações do dispositivo, entre outras coisas. O ClockworkMod Recovery substitui o recovery mode padrão do aparelho por um com funcionalidades extra, tais como criação e restauração de backups do sistema e instalação de ROMs alternativas. Utilizaremos o ClockworkMod Recovery para instalar a ROM com o CyanogenMod 7.
- Baixe o ClockworkMod ROM Manager e instale-o no celular. (O link veio daqui.)
- Baixe o
ClockworkMod Recovery[Update: O link anterior está quebrado. Eis um novo link. Obrigado, Jonathan Henrique!], e salve-o com o nome de update.zip no raiz do SD card do celular. - Aqui temos um pequeno problema: o ClockworkMod Recovery espera ser instalado em um aparelho de modelo GT-I5500, mas os aparelhos vendidos no Brasil são do modelo GT-I5500B, e por isso o ClockworkMod Recovery se recusa a instalar. Se esse for o seu caso (i.e., o aparelho mostra "GT-I5500B" na tela durante o boot):
- Abra o arquivo META-INF/com/google/android/updater-script dentro do zip;
- Remova as quatro primeiras linhas, que hão de ser iguais a estas:
assert(getprop("ro.product.device") == "galaxy5" || getprop("ro.build.product") == "galaxy5" || getprop("ro.product.device") == "GT-I5500" || getprop("ro.build.product") == "GT-I5500" || getprop("ro.product.device") == "GT-I5503" || getprop("ro.build.product") == "GT-I5503" || getprop("ro.product.device") == "GT-I5508" || getprop("ro.build.product") == "GT-I5508"); - Coloque o arquivo modificado de volta dentro do zip.
(Ou use um editor de texto capaz de abrir e modificar os arquivos diretamente a partir do zip, como o Vim.)
- Abra o ROM Manager no celular, e selecione Reboot into Recovery. O celular deverá reiniciar em modo recovery, e apresentar um menu.
- Selecione Install update.zip, ou algo similar.
Pronto! Você já tem o ClockworkMod Recovery instalado. (O ROM Manager possui uma opção Flash ClockworkMod Recovery que teoricamente lhe pouparia todo esse trabalho, mas aparentemente o Galaxy 5 não é suportado oficialmente pelo ClockworkMod Recovery, de modo que essa opção não funciona. Mas você pode testar e ver se tem sorte (já que podem ter adicionado suporte desde que este post foi escrito).)
Instale a ROM do CyanogenMod 7
- Baixe a ROM, e salve-a no SD card do celular. (O link veio daqui.)
- Abra o ROM Manager, e selecione Reboot into Recovery. Você deverá cair no menu do ClockworkMod Recovery (similar mas diferente do menu em que você tinha caído antes).
- Selecione wipe data/factory reset. Isso apagará a partição de dados do dispositivo (o que esse cara diz ser necessário se você estiver instalando o CyanogenMod em um celular com um firmware antigo). Tenha feito backup dos seus dados antes de fazer isso.
- Selecione Install update from sdcard > choose zip from sdcard, e escolha a ROM que você baixou no passo 1. Confirme a instalação e aguarde.
- Se tudo correu bem, selecione Reboot system now.
E está feito. O celular deve iniciar no CyanogenMod (o primeiro boot pode demorar um pouco).
Feito isso, uma boa idéia é reiniciar em recovery mode novamente, através do ROM Manager, e fazer um backup da instalação atual, selecionando backup and restore > backup. Certifique-se de que há espaço suficiente no SD card para fazer o backup (que há de ocupar de 100MB a 200MB). É possível que você tenha que fazer outro wipe data/factory reset logo depois de instalar o CyanogenMod (as teclas Home e Search aparentemente não funcionam logo após a instalação caso um data wipe não seja feito).
Também vale observar que o CyanogenMod não vem com os aplicativos proprietários do Google (o que eu considero uma vantagem). Se você quiser os aplicativos, terá que baixá-los separadamente (use a versão para o Android 2.3.7) e instalar o pacote pelo ClockworkMod Recovery (da mesma maneira como foi feito com o CyanogenMod). Não testei o tal pacote.
Se tudo der errado, ou Como desbrickar um Galaxy 5
Um grande problema desse procedimento é que não é possível voltar atrás: o firmware original do Galaxy 5 usa um sistema de arquivos RFS, que o ClockworkMod Recovery é incapaz de montar, e conseqüentemente de fazer backups. (Por tosquice do ClockworkMod, em verdade; ele poderia muito bem copiar o conteúdo bruto das partições, mesmo sem montá-las.) Assim, depois de instalado o CyanogenMod, não há um método simples e indolor de recuperar a ROM original. Experimentando métodos "alternativos" (a.k.a. facão) de recuperação, eu acabei destruindo o sistema do meu aparelho, o que fez com que ele congelasse no boot (i.e., ficasse soft-bricked).
A grande sacanagem é que ao contrário de outros aparelhos, o Galaxy 5 não tem uma combinação de teclas para iniciar em recovery mode, o que permitiria entrar no menu de recovery e restaurar um backup do CyanogenMod de quando tudo estava funcionando. Um procedimento trivial acaba se tornando um inferno.
Método 1: adb
A primeira coisa a se tentar é usar o adb. O adb é uma ferramenta de desenvolvimento do Android que permite acessar um celular que esteja com modo debug ativado pela USB. O adb é parte do pacote de Platform Tools do Android Software Development Kit. (Alternativamente, você pode baixar os binários para GNU/Linux desta pessoa aleatória na Internet.) Instalado o adb, conecte o celular ao PC pela USB, ligue-o, espere ele "bootar" (e congelar durante o processo), abra um terminal, vá até a pasta onde se encontra o adb, e execute o comando:
./adb reboot recovery
Se o celular for detectado, ele há de reiniciar no menu de recovery, de onde você pode tentar recuperar um backup ou reinstalar uma ROM a partir do SD card. Se ele não for detectado (i.e., o adb mostrar uma mensagem Device not found), você pode experimentar desconectá-lo e reconectá-lo e repetir o comando, e/ou executar ./adb kill-server antes de repetir o comando. Se isso não adiantar, é provável que o celular não esteja em debug mode, e portanto o adb não vai funcionar.
Método 2: Odin + ROM oficial
O segundo método é tentar carregar uma ROM com o bendito Odin. Para isso, você precisará de uma máquina com Windows. O formato das ROMs usadas pelo Odin é diferente do formato usado pelo ClockworkMod, de modo que a ROM do CyanogenMod baixada do MAD Team não pode ser usada (pelo menos não diretamente, e eu não explorei muito o formato do Odin para transformar um formato no outro; afinal eu já tinha explodido o meu sistema brincando com o formato do ClockworkMod).
- Baixe uma das ROMs oficiais. (Eu recomendo a ROM brasileira da Tim, pelo simples fato de que ela existe, e foi a que eu usei; algumas outras apontam para arquivos que não existem mais.)
- Baixe e descompacte o Odin 4 e arquivo EUROPA_v1.0 acompanhante (o link saiu do post linkado acima).
- Com o telefone desligado (retire e recoloque a bateria se necessário), pressione e segure Volume para baixo + Tecla do meio das setas. Sem soltar essas teclas, pressione e segure o botão Power até o telefone ligar, e então solte o Power sem soltar as outras duas. Você deverá ver uma tela de "Downloading", com um ícone do bonequinho do Android em uma placa de "homens trabalhando". Solte as teclas.
- Abra o Odin.
- Marque a opção One package.
- Clique no botão OPS, e selecione o arquivo OPS que você baixou junto com o Odin.
- Clique no botão One Package (bem embaixo na janela), e selecione a ROM.
- Clique no botão Start. A ROM deverá começar a ser carregada no celular, e logo a plaquinha de "androids trabalhando" deverá dar lugar a uma barrinha de progresso.
Nesse momento uma de duas coisas há de ocorrer:
- O celular reinicia e boota na ROM que você acabou de instalar. Problema resolvido. Ou:
- O celular reinicia com uma tela com um sinal de alerta (um ponto de exclamação amarelo dentro de um triângulo). Nesse caso, pressione Home (a tecla com a casinha) ou Menu (a tecla à esquerda dessa); você deverá cair em um recovery mode. Se for o recovery do ClockworkMod, basta recuperar um backup da ROM antiga (assumindo que você tenha um), ou instalar o CyanogenMod novamente, usando o zip baixado do MAD Team (vide instruções acima). Se for o recovery padrão, você pode usá-lo para instalar o ClockworkMod Recovery, seguindo os passos mencionados anteriormente (com a diferença de que você não precisa do ROM Manager, já que você já está em recovery mode). O grande problema é que assim que você acabar de instalar o ClockworkMod Recovery, você vai ter que reiniciar o celular, e como ele não boota mais, e não existe uma combinação de teclas para bootar em recovery mode no Galaxy 5, você não vai conseguir entrar no ClockworkMod. Não sem uma pequena dose de treta...
Método 2½: Odin + fake ROM
Se você não consegue instalar uma ROM oficial com o Odin porque o celular sempre cai em modo "sinal de alerta" logo depois da instalação, você pode se aproveitar desse fato para entrar em modo recovery. Tendo instalado o ClockworkMod Recovery, tal como explicado no método anterior, faça o seguinte:
- Renomeie a ROM oficial que você baixou no passo anterior de blablabla.tar.md5 para blablabla.tar (removendo a extensão md5; você pode ter que mandar o Windows exibir as extensões de arquivos nas opções do Explorer).
- Abra o arquivo tar (você pode usar o 7-zip para isso), e remova todos os arquivos que ele contém, exceto o amss e o csc.rfs.
- Faça o procedimento do método 2 usando esse arquivo alterado no lugar da ROM original no campo One Package. Alguns instantes depois de ter dado Start, o celular deverá cair novamente na tela com o sinal de alerta. Pressione Menu ou Home; você deverá cair no ClockworkMod Recovery. A partir daí, basta recuperar um backup ou instalar o CyanogenMod, como mencionado no método 2.
Se você tiver outras soluções ou dicas, queira deixar um comentário.
Busybox e ssh no Android
2012-07-17 14:15 -0300. Tags: comp, unix, android, em-portugues
Há umas três semanas comecei a usar um smartphone. É um ótimo aparelho, até que se tenha que usá-lo como celular.
De qualquer forma, uma das grandes vantagens do Android é que o sistema operacional por baixo de tudo é um Linux mais ou menos normal (sem GNU, todavia), e portanto é possível rodar praticamente qualquer coisa que rode em Linux/ARM em um smartphone com Android.
![[Imagem de um smartphone rodando o ssh]](img/android-ssh.jpg "A foto está horrível, mas é o que a casa oferece")
E se não fosse pelo teclado virtual, já teria instalado o Nethack.
As condições mínimas para diversão são um terminal e os utilitários padrão (ls, cp, grep, etc.). Existe um pacote pronto com um emulador de terminal, Busybox, e cliente e servidor de ssh e rsync. Infelizmente, esse pacote requer o Android 2.3 ou superior (no meu brinquedo, que vem com um Android 2.2, ele inicia o terminal, dá três vibradas seguidas e congela). É possível, entretanto, obter as partes separadamente elsewhere e juntá-las.
O emulador de terminal pode ser encontrado no Android Market, mas se você é pagão e não tem conta no Google, pode obtê-lo diretamente da forja. A instalação é trivial e deixada como exercício para o leitor.
Tendo o terminal, podemos instalar o Busybox. Encontrei binários pré-compilados do Busybox para o Android neste site super-confiável. Esse binário deverá ser colocado na memória principal do aparelho, já que aparentemente o Android não dá permissão de execução a binários no /sdcard por padrão. Para tanto, você deverá se tornar root do mal, o que exige um equipamento rooteado. Obtive meu smartphone de segunda mão, e ele já veio rooteado, mas guias de como rootear não faltam. Assumindo um aparelho já rooteado:
- Abra o Terminal Emulator.
- Digite su. Talvez o sistema apresente uma janelinha pedindo confirmação para fornecer direitos de root ao su.
- mkdir /data/busybox
- mv /sdcard/onde-quer-que-você-tenha-baixado-o-busybox /data/busybox/busybox
- cd /data/busybox
- chmod 755 busybox
- Crie os links com os nomes dos utilitários padrão para o busybox. Em tese, ./busybox --install deveria fazer isso, mas para mim não funcionou. ./busybox --list aparentemente também não existe nessa versão do Busybox, então tive que apelar para a seguinte treta:
for i in $(./busybox | ./busybox sed -n 's/,//gp' | ./busybox sed 1d); do ln -s busybox $i; done
- Pressione a tecla de menu, e selecione as Preferences do Terminal Emulator.
- Ajuste Initial command para: export PATH="/data/local/bin:/data/busybox:/data/dropbear:$PATH"
- Ajuste Command line para: /data/busybox/sh -
Pronto! A partir de agora, quando você iniciar o terminal, o Busybox abrirá automaticamente, e os comandos nele contidos estarão disponíveis.
Por último, instalemos o Dropbear, um cliente/servidor de ssh más pequeño del mundo. Os binários podem ser obtidos aqui (link no final do post). Baixe-o e faça o seguinte:
- Abra o Terminal Emulator.
- su
- cd /data
- mkdir dropbear
- cd dropbear
- unzip /sdcard/onde-quer-que-você-tenha-baixado-o-dropbear.zip
- chmod 755 *
E está feito! Agora você já pode derrubar a Internet de onde quer que você esteja.